
Renogy Flexible Solar Panel Install
How to Install Flexible Solar Panels on a Camper Van (DIY Guide for Transits, Sprinters, & Promasters)
Converting a van into a camper means making smart solar power choices. If you're planning a camper van solar panel install, flexible panels can be a great lightweight, low-profile option. In this guide, we’ll show you how to install flexible solar panels on a van step by step, using Renogy 100W flexible solar panels and a no-drill mounting system.

Why Flexible Solar Panels for a Camper Van?
We compared flexible vs. rigid solar panels and chose Renogy flexible solar panels for these reasons:
✅ Lightweight – 70% lighter than rigid panels, improving fuel efficiency.
✅ No Drilling Required – No need to put holes in our van’s roof or build a bulky rack.
✅ Stealthy Design – Low-profile look makes it less obvious that it’s a camper.
✅ Curves with the Roof – Ideal for the slightly curved Transit van roofline.
The trade-off? Flexible panels are 5-10% less efficient than rigid ones (16-18% efficiency vs. 21%). Plus, direct mounting can trap heat, reducing performance and lifespan. To fix this, we designed a custom airflow mounting system to keep them cooler.
Materials We Used for Our Van Solar Panel Install
🔹 Renogy 100W Flexible Solar Panels – We have 4 panels, totaling 400W of off-grid power.
🔹 Clear Polycarbonate Wall Panel – Used to create the mounting base.
🔹 Smaller Polycarbonate Sheet – Another option for mounting just 1 panel.
🔹 48” Aluminum T-Track Rails – Secures the panels to the van roof.
🔹 Vinyl Lattice End Caps – Protects edges and reduces wind lift.
🔹 Sikaflex 715 – Heavy-duty adhesive for securing panels & tracks.
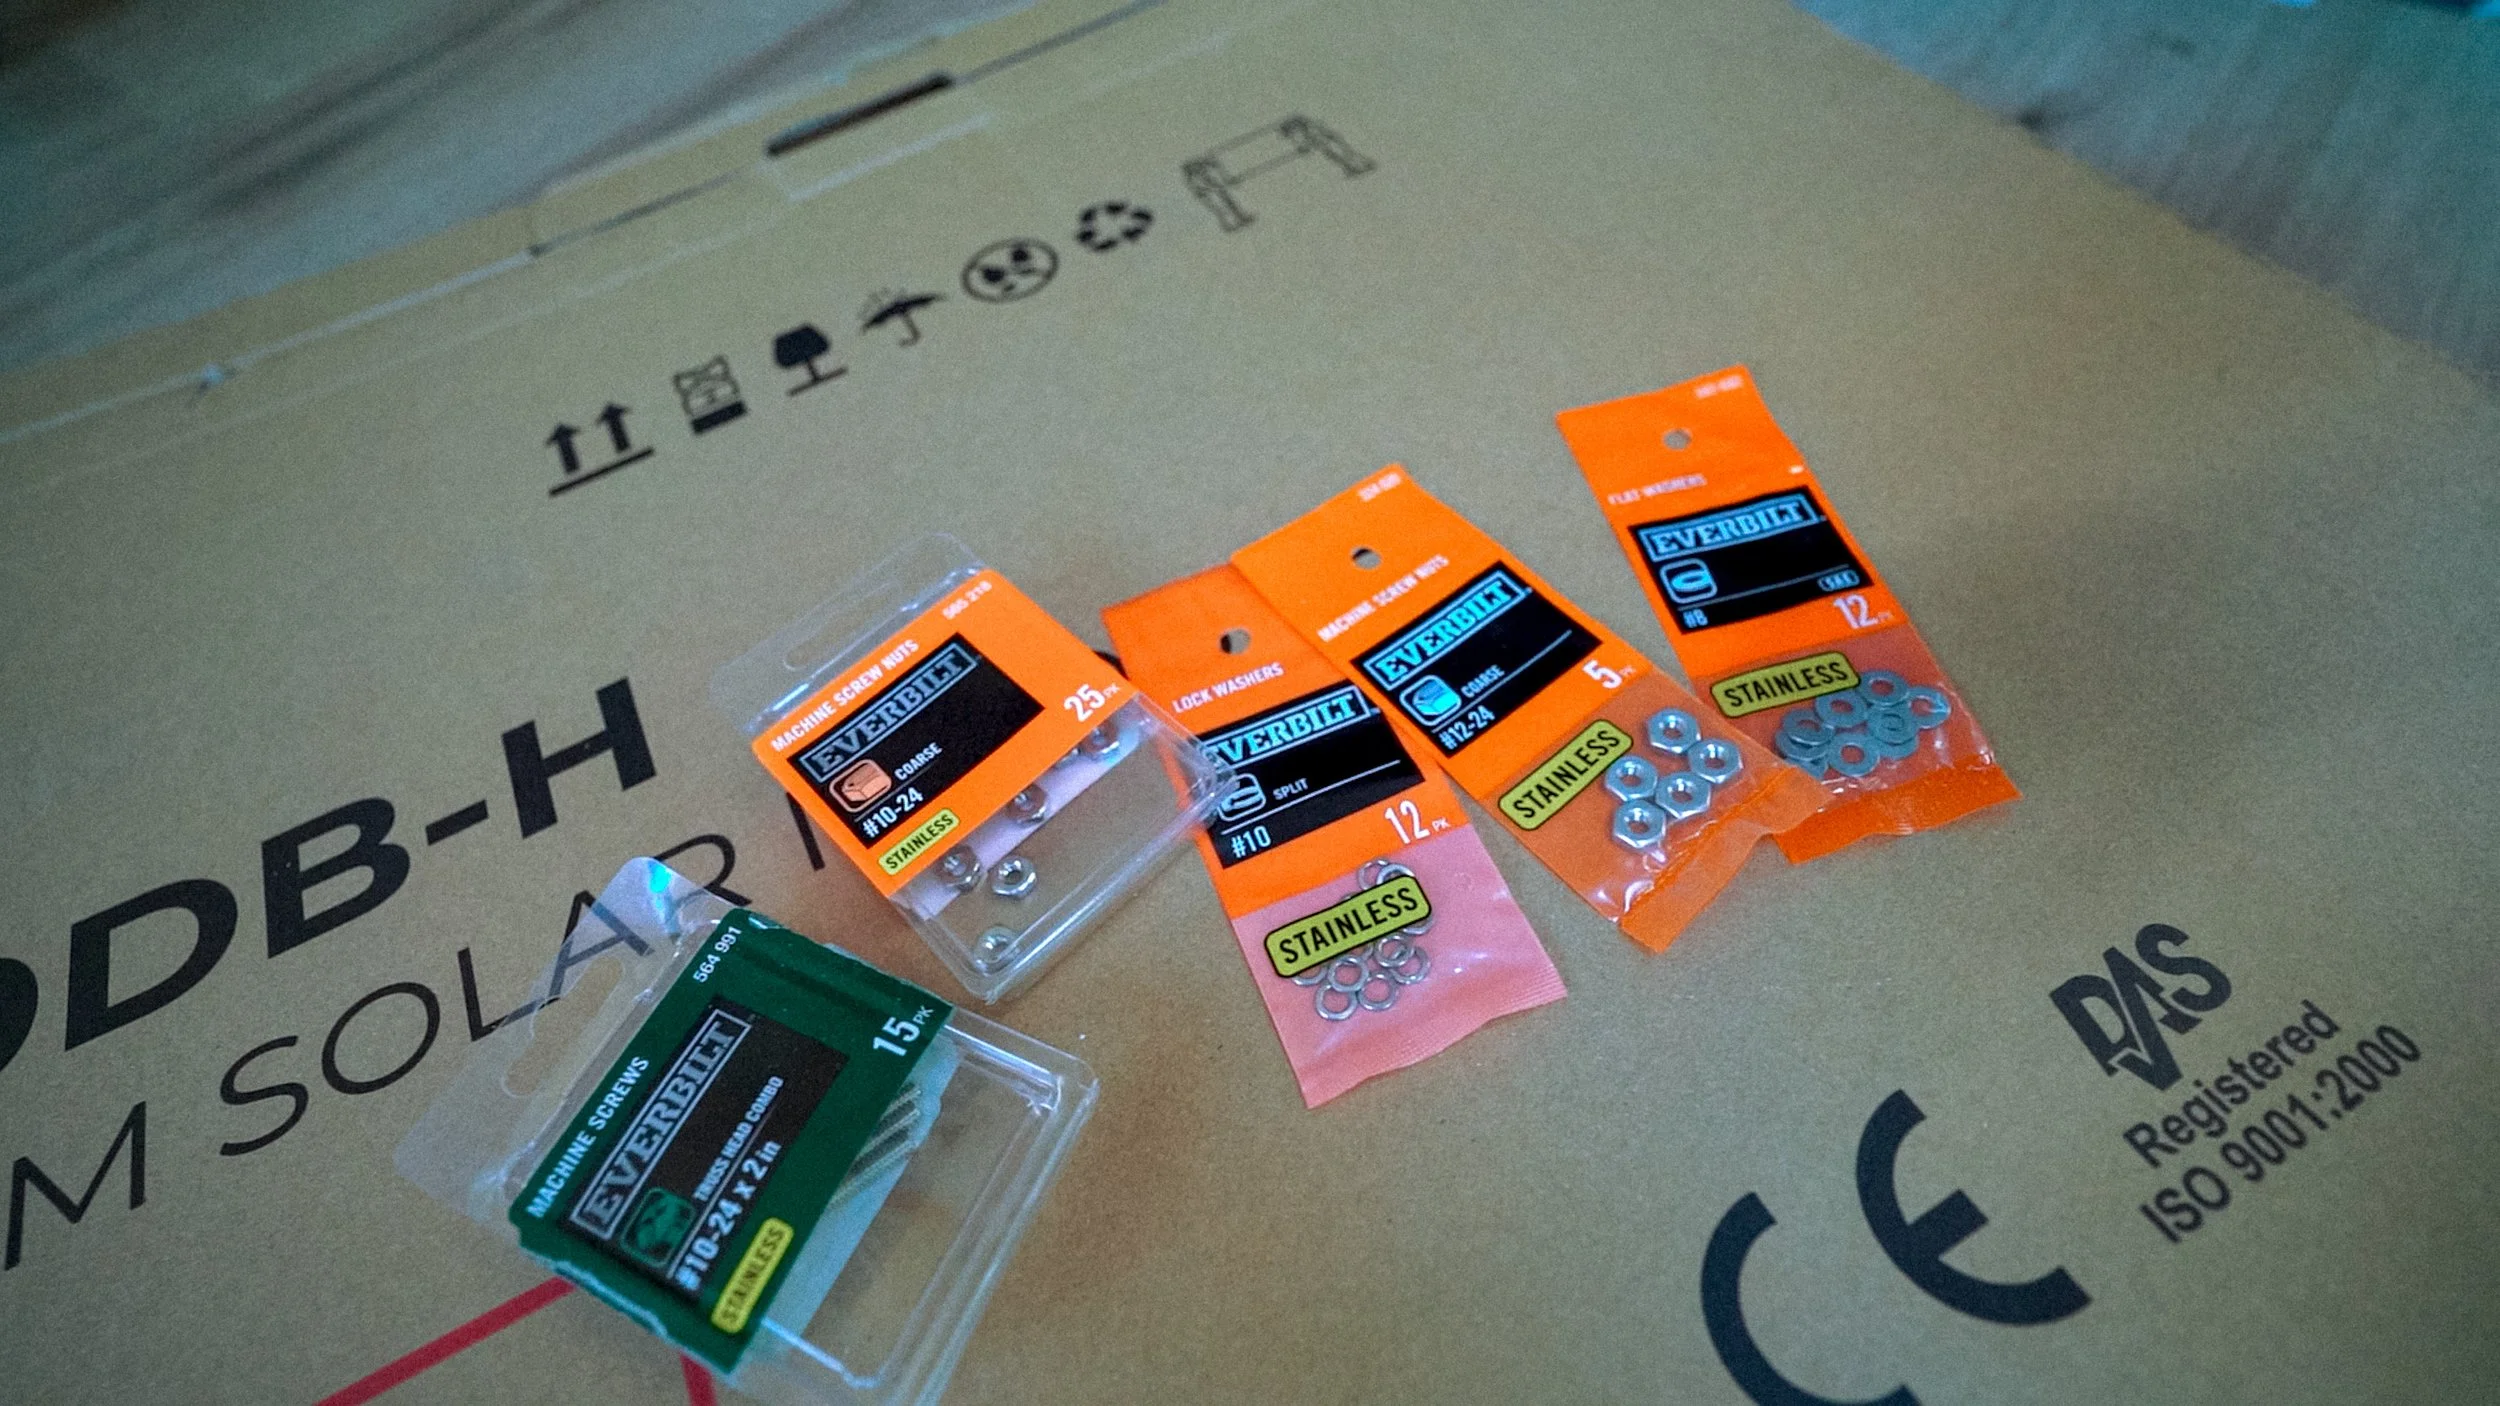
🔹 Hardware – Stainless steel bolts, nuts, washers, and lock washers–match panel grommets


Step-by-Step Guide: Installing Flexible Solar Panels on a Van
1. Build the Polycarbonate Mount
✅ Cut the polycarbonate sheet to match the height of each panel but 3 inches narrower to leave room for T-Track rails.
✅ Cut a small rectangular channel out of the middle (a few inches from the top, extending to the bottom) for better airflow.
✅ Attach the polycarbonate sheet to the panel using Sikaflex or another strong adhesive.


2. Attach Vinyl Lattice End Caps
✅ Cut end caps out of the vinyl lattice to fit the front and rear edges of the panel.
✅ Front cap: Notch out corners for front grommet bolts & wiring connectors.
✅ Rear cap: Cut to fit the insulated layer width and notch out airflow & drainage sections.
✅ If the fit is tight, slightly compress the polycarbonate sheet to ensure a snug fit.
3. Mount the Solar Panels & T-Tracks on the Roof
✅ Carefully carry the assembled panel up to the roof.
✅ Position the T-Track rails along the edges of the panel.
✅ Mark placement with a sharpie for accurate installation.
✅ Clean the roof & T-tracks thoroughly with acetone or rubbing alcohol.
✅ Apply Sikaflex, strong marine adhesive, or Eternabond tape to bottom of T-Track rails.
✅ Press and hold firmly to ensure a strong bond.
✅ Seal around the T-Track base with Sikaflex for added strength & a clean finish.
5. Attach the Solar Panel
✅ Slide bolts into the T-tracks and align them with the panel’s grommet holes.
✅ Secure with stainless steel nuts & lock washers, tightening them down.


Final Thoughts: How Our Flexible Solar Panel Setup is Performing
Installing Renogy Flexible Solar Panels made our van build lightweight, sleek, and drill-free—a perfect fit for off-grid adventures. After 6+ months on the road, our van solar setup is holding strong! The panels have endured rain, wind, and extreme heat, and they’re still charging our battery bank efficiently.
A huge shoutout to Brian from RV with Tito, whose excellent video inspired our no-drill mounting system! He had a different brand of solar panels. So our hardware for securing the panels is a little different from his.
If you’re planning a camper van solar panel install, we highly recommend this setup! Check out the full list of materials above to start your own DIY van solar project.💬 Got questions about solar panels or van builds? Drop a comment below—we’d love to help!


Affiliate Disclosure – Keeping the Van Rolling!
Just a heads-up to our fellow van lifers—some of the links on this site are Amazon affiliate links. That means if you click on one and make a purchase, we earn a small commission (at no extra cost to you!). It helps keep this site running, the coffee flowing, and the adventure tips coming. We only recommend products we truly believe in and use ourselves. Thanks for your support—happy building and safe travels!